The whole set of the lens kit includes:
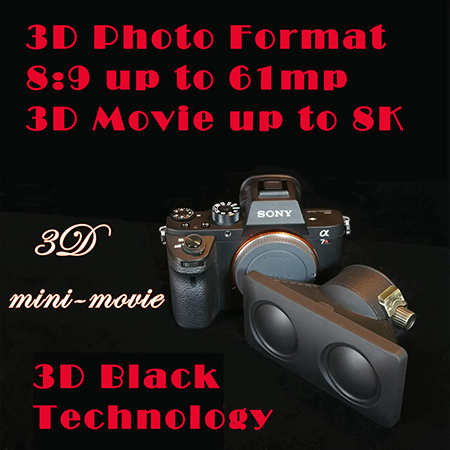
The interchangeable 3D lens
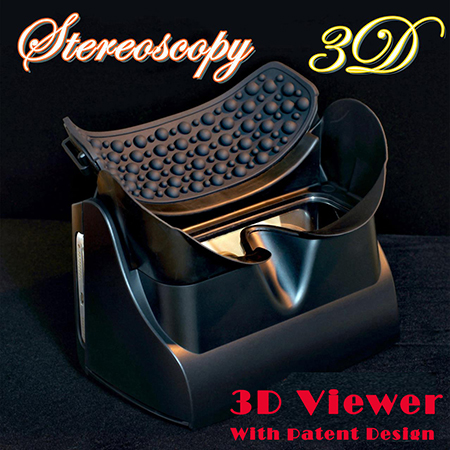
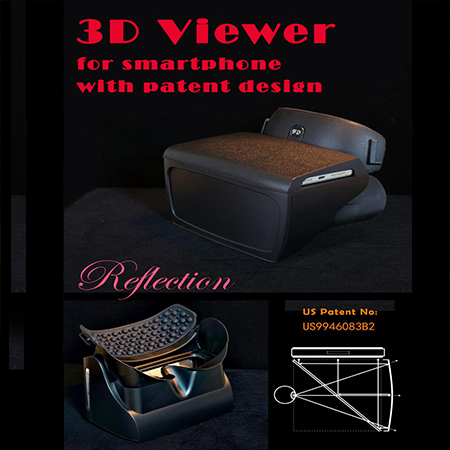
3D viewer for smartphone
Connector from the camera to the smartphone to be able to record the 3D video or photo to smartphone then to view on the viewer.
Designed as an interchangeable lens for full-size sensor mirrorless reflective cameras*.
You can use the following mounts:
- Canon RF
- Nikon Z
- Sony E
- Panasonic L
- Leica L
- Sigma L
With a 16:9 camera, results are 8:9.
Perfectly matches the new ProMa 3D tablet, the MASTER Plus 2024, which supports portrait 3D and landscape 3D.
Don't worry about the camera's 2d display. See the results in real-time even before you take the picture. Even better, you can record video to your phone or stream in real time to the internet!
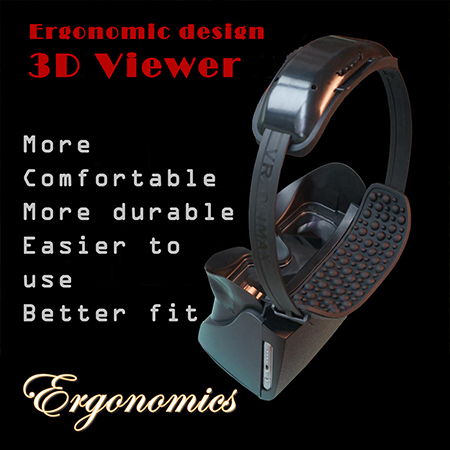
Carefully designed for improved ergonomics.
3D Lens Kit Introduction
This stereoscopic lens is designed for full-frame mirrorless cameras and consists of two sets of lenses, each corresponding to half of the camera's sensor. The stereoscopic lens captures standard stereoscopic image files in the form of cross format in left and right format, which can be played directly on most stereoscopic playback devices. If using VR glasses or a mobile phone box, we provide stereoscopic video playback software and stereoscopic image viewing software, which can play directly through the software or be converted into parallel format.
Stereoscopic imaging is the highest level of visual technology as it closely mimics human senses. Stereoscopic imaging not only vividly depicts real-life images, but also provides a level of detail and texture unmatched by ordinary flat images. With this stereoscopic lens, you can easily enter the highest realm of visual technology, capturing realistic images and experiencing stunning visual effects.
In addition, when paired with our 3D measurement software, this stereoscopic lens also possesses the capability to measure three-dimensional size of objects and spaces with a single snap, which can be recorded in a single stereoscopic photo.
Specifications and Accessories
Lens: Dual lenses
Focal length: 35mm, equivalent to approximately 52mm full-frame format, and 70mm in horizontal stereoscopic mode
Aperture: Fixed aperture, options of F8/F5.6/F4
Lens distance: 73mm
Intersection point: 2m (intersection point of the two lens axes, objects displayed on the bare-eye stereoscopic screen at 2 meters distance, with objects within 2 meters appearing out of the screen and objects beyond 2 meters appearing within the screen. Can also be adjusted by accompanying software.)
Object distance: 0.6m - ∞
Focus: Manual (automatic version available for upgrade in the future)
Mount: Sony E / Canon RF / Nikon Z / Panasonic L (L-mount to be provided in the future, mount is optional and multiple mounts are available)
Accessories: 3D capture card, lens cap, sunshade, lens hood, knob cover, lens barrel, moisture-proof agent, manual, adjustment stick (will be included in later versions), stereoscopic capture card software, stereoscopic video playback software, stereoscopic image viewing software, which includes conversion of left and right format for stereoscopic video files and three-dimensional measurement for stereoscopic image viewing software.
Instructions
Lens
1. Lens Installation: The lens mount has a mark that should be aligned with the mark on the camera body. Simply insert the lens and rotate it to secure it. Note: internal filters cannot be used when using a 3D lens.
2. Settings: For manual focus lenses, you need to allow "shutter release without lens" in the camera settings. Use the A mode (aperture priority) for shooting, and set the ISO to AUTO. Minimum ISO AUTO speed should be 1/125 or higher. For the aspect ratio, use 16:9 as it works well for VR goggles. 3D lenses are only compatible with full-frame sensors and cannot be used with any crop modes. Video resolution of 1080p, 4k and 8k are all acceptable. Note that some cameras with high pixel count or high frame rates may require a crop mode, which cannot be used for 3D shooting.
3. Monitor: Our reflective VR/AR goggles can be used as a 3D monitor for the camera. You need a 3D capture card, with one end connected to the camera mini-HDMI port, and the other end connected to a mobile phone with Type-C port. Our software, VR-Camera is compatible with Android and can be downloaded by scanning the QR code. Simply install the driver software and you're ready to use the 3D monitor (see picture). Turn off the "HDMI information display" in the camera HDMI settings. Note that the camera's photo aspect ratio temporarily does not support 3:2, so use 16:9 instead. Our reflective VR goggles also have AR function. Simply replace the AR lens to see both the monitor and what's in front of you.
4. Precise Focus: To achieve precise focus, the camera's focus magnification function should be used. It is recommended to set the focus magnification time to unlimited and assign it to a custom button for easy access during photography. Move the focus magnification area icon to the center of the screen so that with one press of the custom button, the magnification area icon will appear in the middle of the screen. Press the button again to magnify the area and increase the magnification with each subsequent press. Press the button again to return to the normal view, and then take the photo or video. When using the magnifying eyepiece, only one eye should be used for viewing. To facilitate precise focus, turn off the peak focusing setting. Adjust the lens focus using the focus adjust knob (Figure 1, 1) until the subject is clear. Alternatively, the focus can also be estimated by distance. Set the distance indicator to 1 meter, lock it in place, and attach the silicon cover. Align the pointer on the cover to the 1 meter mark and estimate the focus distance accordingly (Figure 6). For automatic focus, select the focus point in the middle of the half screen view (automatic focus will be available in future upgrades).
5. Remote Positioning: The factory setting for the farthest clear position is usually 6 meters, which is when the focus knob is turned to the far end and the clearest area is at 6 meters, indicated by the pointer on the sleeve located at the far horizon marker. The depth of field range for 6 meters is about 4-10 meters (specific depth of field depends on the aperture). Remote positioning can also be adjusted according to personal needs by adjusting the screw (Fig. 2, 4) to position the most commonly used farthest clear distance for quick focusing. (Note: The height of the screw head should not exceed the end of the partition, otherwise it may damage the camera's shutter).
6. Normal use requires the lens to have a dust filter (Figures 1 and 2) and, if a filter is present, it must be used with a lens hood (3). The lens hood blocks lateral light to prevent it from reflecting onto the filter and then onto the image. To attach and detach the lens hood, refer to Figure 2 and either push it outward (Figures 2 and 5) or press it in (making sure it falls into the center position). Alternatively, a shading hood (Figure 3) can also be used with better effect instead of the lens hood.
7. No filter usage (not recommended): For the best image quality, the filter (2) can be removed and the lens cap (Fig. 5) can be used instead. For even better results, a shading tube (Fig. 3) can be added. To remove the filter, refer to Fig. 2 and pry up at position 6, then push up a bit and pry up at position 7. When reattaching the filter, ensure that the coated side is facing inward. Removing the filter does not significantly improve the image quality and may damage the reflector, so it is not recommended. If the lens is damaged, the factory offers a free repair or replacement service, which is not a major issue.
8. Stereoscopic live streaming: Use the "live streaming of mobile screen content" method (i.e. on the Douyin app, click "+", "start live streaming", "mobile gaming", "landscape mode", "start mobile gaming live streaming", "allow", "enable", and "display on top of other apps") to live stream the content on your mobile screen. The screen content is the same as the content viewed through the camera monitor on your phone. However, due to the cross-format created by the 3D lens, the content needs to be adapted for viewing on VR glasses through the use of a VR capture card software. To do this, connect your camera and phone with a VR capture card, open the VR capture card software, and you can display parallel-format stereoscopic images on your mobile screen.
9. Lens Adjustment: There may be slight inconsistencies in focus between the left and right images captured by the camera lens. If high precision is required, the lens can be adjusted accordingly. A lens adjustment tool will be provided in future versions. To make an adjustment, rotate the lens on the side that is farther from the clear focus point by inserting the tool at the bottom of the opposite lens and turning in a clockwise direction. It is important to note that the left and right of the image are reversed due to the cross format, and it is not recommended to turn the lens counterclockwise as it has already been screwed to the maximum during factory settings.
10. Collection: The lens should be stored in a moisture-proof way.
11. Cleaning: Use a lens brush and a balloon to clean. Avoid wiping the reflecting lens as much as possible, and therefore it is recommended to use it carefully in a normal way.


The whole set of the lens kit includes:
The interchangeable 3D lens
3D viewer for smartphone
Connector from the camera to the smartphone to be able to record the 3D video or photo to smartphone then to view on the viewer.
Designed as an interchangeable lens for full-size sensor mirrorless reflective cameras*.
You can use the following mounts:
- Canon RF
- Nikon Z
- Sony E
- Panasonic L
- Leica L
- Sigma L
With a 16:9 camera, results are 8:9.
Perfectly matches the new ProMa 3D tablet, the MASTER Plus 2024, which supports portrait 3D and landscape 3D.
Don't worry about the camera's 2d display. See the results in real-time even before you take the picture. Even better, you can record video to your phone or stream in real time to the internet!
Carefully designed for improved ergonomics.
3D Lens Kit Introduction
This stereoscopic lens is designed for full-frame mirrorless cameras and consists of two sets of lenses, each corresponding to half of the camera's sensor. The stereoscopic lens captures standard stereoscopic image files in the form of cross format in left and right format, which can be played directly on most stereoscopic playback devices. If using VR glasses or a mobile phone box, we provide stereoscopic video playback software and stereoscopic image viewing software, which can play directly through the software or be converted into parallel format.
Stereoscopic imaging is the highest level of visual technology as it closely mimics human senses. Stereoscopic imaging not only vividly depicts real-life images, but also provides a level of detail and texture unmatched by ordinary flat images. With this stereoscopic lens, you can easily enter the highest realm of visual technology, capturing realistic images and experiencing stunning visual effects.
In addition, when paired with our 3D measurement software, this stereoscopic lens also possesses the capability to measure three-dimensional size of objects and spaces with a single snap, which can be recorded in a single stereoscopic photo.
Specifications and Accessories
Lens: Dual lenses
Focal length: 35mm, equivalent to approximately 52mm full-frame format, and 70mm in horizontal stereoscopic mode
Aperture: Fixed aperture, options of F8/F5.6/F4
Lens distance: 73mm
Intersection point: 2m (intersection point of the two lens axes, objects displayed on the bare-eye stereoscopic screen at 2 meters distance, with objects within 2 meters appearing out of the screen and objects beyond 2 meters appearing within the screen. Can also be adjusted by accompanying software.)
Object distance: 0.6m - ∞
Focus: Manual (automatic version available for upgrade in the future)
Mount: Sony E / Canon RF / Nikon Z / Panasonic L (L-mount to be provided in the future, mount is optional and multiple mounts are available)
Accessories: 3D capture card, lens cap, sunshade, lens hood, knob cover, lens barrel, moisture-proof agent, manual, adjustment stick (will be included in later versions), stereoscopic capture card software, stereoscopic video playback software, stereoscopic image viewing software, which includes conversion of left and right format for stereoscopic video files and three-dimensional measurement for stereoscopic image viewing software.
Instructions
Lens
1. Lens Installation: The lens mount has a mark that should be aligned with the mark on the camera body. Simply insert the lens and rotate it to secure it. Note: internal filters cannot be used when using a 3D lens.
2. Settings: For manual focus lenses, you need to allow "shutter release without lens" in the camera settings. Use the A mode (aperture priority) for shooting, and set the ISO to AUTO. Minimum ISO AUTO speed should be 1/125 or higher. For the aspect ratio, use 16:9 as it works well for VR goggles. 3D lenses are only compatible with full-frame sensors and cannot be used with any crop modes. Video resolution of 1080p, 4k and 8k are all acceptable. Note that some cameras with high pixel count or high frame rates may require a crop mode, which cannot be used for 3D shooting.
3. Monitor: Our reflective VR/AR goggles can be used as a 3D monitor for the camera. You need a 3D capture card, with one end connected to the camera mini-HDMI port, and the other end connected to a mobile phone with Type-C port. Our software, VR-Camera is compatible with Android and can be downloaded by scanning the QR code. Simply install the driver software and you're ready to use the 3D monitor (see picture). Turn off the "HDMI information display" in the camera HDMI settings. Note that the camera's photo aspect ratio temporarily does not support 3:2, so use 16:9 instead. Our reflective VR goggles also have AR function. Simply replace the AR lens to see both the monitor and what's in front of you.
4. Precise Focus: To achieve precise focus, the camera's focus magnification function should be used. It is recommended to set the focus magnification time to unlimited and assign it to a custom button for easy access during photography. Move the focus magnification area icon to the center of the screen so that with one press of the custom button, the magnification area icon will appear in the middle of the screen. Press the button again to magnify the area and increase the magnification with each subsequent press. Press the button again to return to the normal view, and then take the photo or video. When using the magnifying eyepiece, only one eye should be used for viewing. To facilitate precise focus, turn off the peak focusing setting. Adjust the lens focus using the focus adjust knob (Figure 1, 1) until the subject is clear. Alternatively, the focus can also be estimated by distance. Set the distance indicator to 1 meter, lock it in place, and attach the silicon cover. Align the pointer on the cover to the 1 meter mark and estimate the focus distance accordingly (Figure 6). For automatic focus, select the focus point in the middle of the half screen view (automatic focus will be available in future upgrades).
5. Remote Positioning: The factory setting for the farthest clear position is usually 6 meters, which is when the focus knob is turned to the far end and the clearest area is at 6 meters, indicated by the pointer on the sleeve located at the far horizon marker. The depth of field range for 6 meters is about 4-10 meters (specific depth of field depends on the aperture). Remote positioning can also be adjusted according to personal needs by adjusting the screw (Fig. 2, 4) to position the most commonly used farthest clear distance for quick focusing. (Note: The height of the screw head should not exceed the end of the partition, otherwise it may damage the camera's shutter).
6. Normal use requires the lens to have a dust filter (Figures 1 and 2) and, if a filter is present, it must be used with a lens hood (3). The lens hood blocks lateral light to prevent it from reflecting onto the filter and then onto the image. To attach and detach the lens hood, refer to Figure 2 and either push it outward (Figures 2 and 5) or press it in (making sure it falls into the center position). Alternatively, a shading hood (Figure 3) can also be used with better effect instead of the lens hood.
7. No filter usage (not recommended): For the best image quality, the filter (2) can be removed and the lens cap (Fig. 5) can be used instead. For even better results, a shading tube (Fig. 3) can be added. To remove the filter, refer to Fig. 2 and pry up at position 6, then push up a bit and pry up at position 7. When reattaching the filter, ensure that the coated side is facing inward. Removing the filter does not significantly improve the image quality and may damage the reflector, so it is not recommended. If the lens is damaged, the factory offers a free repair or replacement service, which is not a major issue.
8. Stereoscopic live streaming: Use the "live streaming of mobile screen content" method (i.e. on the Douyin app, click "+", "start live streaming", "mobile gaming", "landscape mode", "start mobile gaming live streaming", "allow", "enable", and "display on top of other apps") to live stream the content on your mobile screen. The screen content is the same as the content viewed through the camera monitor on your phone. However, due to the cross-format created by the 3D lens, the content needs to be adapted for viewing on VR glasses through the use of a VR capture card software. To do this, connect your camera and phone with a VR capture card, open the VR capture card software, and you can display parallel-format stereoscopic images on your mobile screen.
9. Lens Adjustment: There may be slight inconsistencies in focus between the left and right images captured by the camera lens. If high precision is required, the lens can be adjusted accordingly. A lens adjustment tool will be provided in future versions. To make an adjustment, rotate the lens on the side that is farther from the clear focus point by inserting the tool at the bottom of the opposite lens and turning in a clockwise direction. It is important to note that the left and right of the image are reversed due to the cross format, and it is not recommended to turn the lens counterclockwise as it has already been screwed to the maximum during factory settings.
10. Collection: The lens should be stored in a moisture-proof way.
11. Cleaning: Use a lens brush and a balloon to clean. Avoid wiping the reflecting lens as much as possible, and therefore it is recommended to use it carefully in a normal way.
| 3D Lens Kit Introduction |